Deck the halls with boughs of... homemade Christmas crafts! Here are some fun ideas we've been tinkering with during the school holidays (and you can too!)
Oh yes, we are feeling more festive by the day over here at HoneyKids HQ! With Christmas gift shopping in full flow, the decorations almost up and our advent calendars purchased, we can almost smell the Christmas turkey. And we’ve been keeping our own small elves busy with a ton of Christmas crafts too! Yep: the art box has taken a battering and we’ve been whipping up these easy Christmas craft ideas for kids of all ages. Now it’s your turn!
Click the links below for more information:
Easy crafts for kids
Christmas crafts that light up
Teacher-approved crafts
Toilet roll Christmas craft ideas
Easy Christmas crafts for kids
1. Christmas snow globe

What a delightful way to kick off the holiday season with this DIY snow globe craft from Savannah Kay Designs! The kids will absolutely adore the final creation. Plus, the craft supplies are readily available at dollar stores, making it super convenient.
2. Paper gingerbread house
We’re absolutely loving this easy paper gingerbread house from instructables.com! It’s as mouth watering as the real thing. While building the house might be more suited for the older ones, decking it out with candies will be an absolute blast for the little ones. It’s a fantastic Christmas project that everyone in the family can enjoy together!
3. A pom pom DIY Christmas wreath
You’ll need:
- Hot glue gun (we found ours at Spotlight)
- Coloured wool (also from Spotlight)
- Cardboard
- Twine (from Daiso)
- Scissors
- Marker
To make:
Watch our easy video above!
4. Christmas gift tags

Got tons of gifts heading for your Christmas tree? We’ve got your back with some cute Christmas gift tags ready to download and print – and guess what? There’s a colouring version for the kiddos to dive into. Perfect for a rainy day activity, right?
5. Santa Christmas card

We’ve noticed that finding affordable and enjoyable greeting cards and gift tags in Singapore can be a challenge. That’s why we’re enthusiastic about creating our own! Explore our entertaining list of easy-to-make Christmas cards with kids that are both fun and budget-friendly. Get ready for some crafting fun!
6. DIY glittering brass Christmas baubles

You’ll need:
- Decorative string
- String for hanging
- Tacks
- Styrofoam balls
- Superglue
- Paperclip
To make:
1. Starting from the bottom, dap a bit of super glue onto the Styrofoam ball and stick down the end of your string before you begin winding.
2. Glue as you wind your string around the bauble until you get almost to the top. Be extra careful with the superglue – it can get extra messy and we know how icky superglue can feel on skin.
3. Unfold and straighten the paperclip to bend it in the middle. Cut off some of your string for hanging, and make a loop, tying a knot at the end. Put the loop of string through the bent paper clip and push it into the top of your Styrofoam ball, all the way down until the string is secure for hanging.
4. Finish winding your string onto the bauble until you reach the top.
5. Place some brass tacks around the bauble for that extra Christmas sparkle!
Alternatively, you can also do an all-tack bauble! Start from the bottom of the Styrofoam ball and push the brass tacks in, working around the ball as evenly as possible, until you are near the top.
7. Popsicle stick decorations

While we’ve bagged some seriously lovely baubles for our Christmas tree this year, there’s something extra spesh about a homemade decoration. We’re loving these popsicle numbers by The best ideas for kids.
8. Paper tree advent calendar

Here’s an alternative to the chocolate calendars we’ve been gleefully consuming since the beginning of December: a paper tree advent calendar by ikat bag. The blingier the better, we say.
9. Paper straw Christmas trees

We’ve long been lamenting the woes of plastic straws to our kids, so now we’re taking our paper straw commitment to the next level. This time, we’re turning them into Christmas decorations! Follow this super-easy tutorial by Bright Star Kids for a good dose of eco-friendly fun.
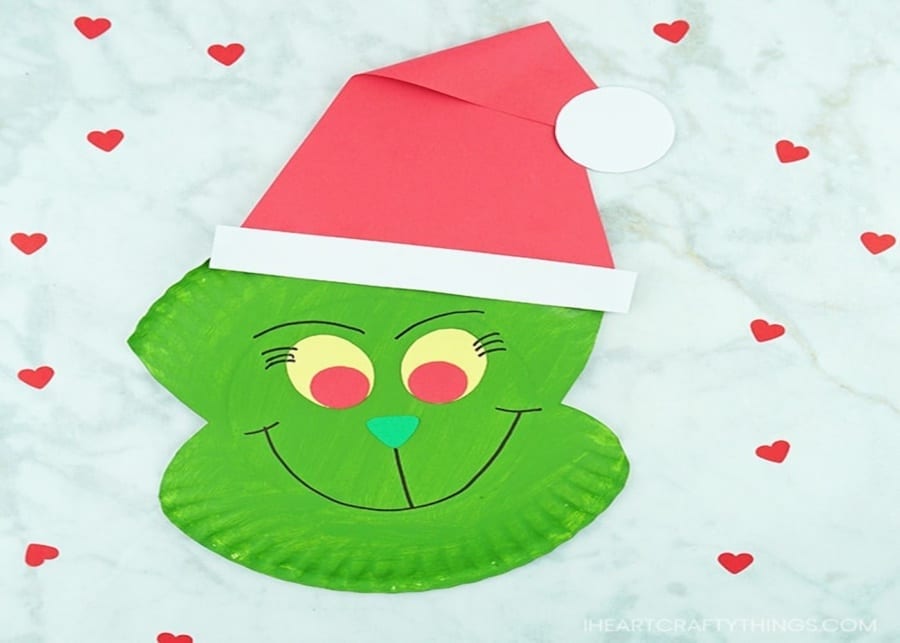
10. Grinch paper plate

Get in on the Grinch fun with these cute paper plates by I Heart Crafty Things. Sour pusses need not apply!
Christmas crafts that light up
11. Snowy mason jar

We found this incredibly enjoyable craft from A Pumpkin & A Princess, and boy, is it a breeze to do! Our tip? If you’re lacking mason jars, opt for plastic cups—they work just as well for this project. Just remember to use LED tea lights inside your paper craft, and you’re all set to get started. Psst…use this for your dining table decor!
12. Tea Light snowman ornament
Just keep a couple of electric tea lights nearby for this super easy craft courtesy of Red Ted Art. Kids will adore seeing their miniature creations light up, adding a charming touch to your Christmas decorations.
13. Light up Christmas tree
A Christmas tree that actually lights up? Absolutely! This charming craft by ikatbag only needs a handful of craft supplies. The kids will have a blast decorating the tree, while you handle the electrical part. Don’t forget to have your camera ready to capture the priceless reaction from your little ones when you illuminate your finished project!
Christmas crafts for kids, recommended by teachers!
Looking to get crafty with your kids this Christmas? We asked some clever peeps from a selection of Singapore’s international schools for their handy-dandy tutorials so you and your little ones can get a’craftin’ this holiday season. These ideas are best suited for young ‘uns aged three and up. And, as always, don’t forget to supervise where craft supplies are involved. Now go enjoy some Christmas crafts!
14. Cute Christmas Boxes

This Christmas, create simple and fuss-free DIY Christmas boxes with your children and place them under the tree or around the house for a touch of vibrancy. It’s the perfect activity to keep your littlies occupied and entertained during this holiday season!
You’ll need:
- Used cardboard boxes (small)
- Craft glue
- Felt cloth of different colours
- Multicoloured pompom balls
- Glitter glue
- Ribbons
To make:
1. Cover the entire cardboard box with glue, then stick on pieces of felt cloth. You can go with one colour all over, or layer small pieces of a different colour of felt cloth on top if you prefer.
2. Glue the pompoms around the top and sides of the box.
3. Decorate your box further with glitter glue for extra sparkle!
4. Tie a ribbon around the box for the finished piece.
Supplied by Eton House International School and Pre-School
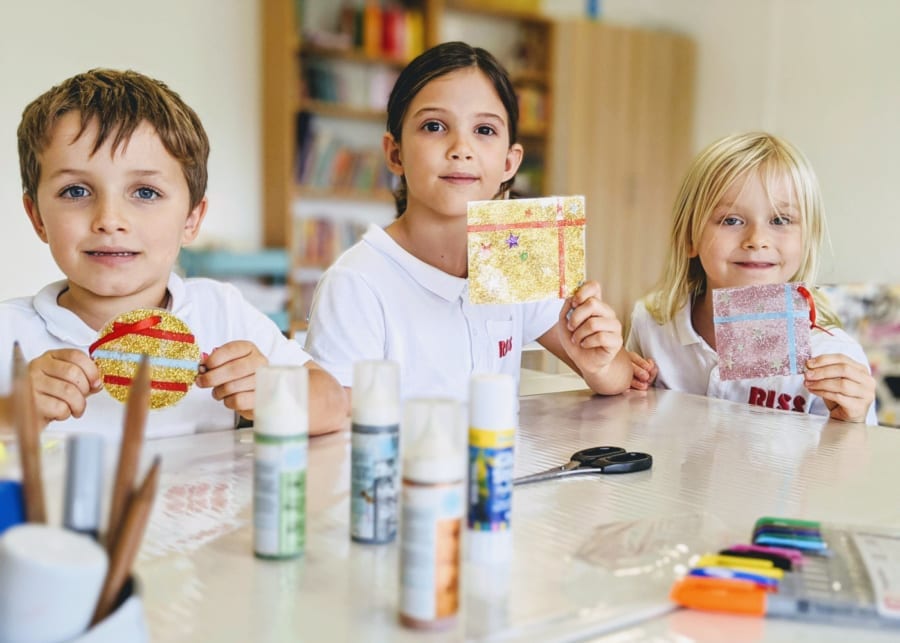
15. Sparkly Present Decorations

This simple, easy-to-make Christmas decoration can be added to your Christmas tree, hung around the house or given as a lovely handmade present to family members.
You’ll need:
- Child-safety scissors
- Self-adhesive book-covering film/contact paper
- Star-shaped sequins
- Glitter
- Thin ribbon or metallic string
To make:
1. Cut two squares the same size from the book-covering film (be sure to do this yourself if you don’t have child-safety scissors). You could also try circles or any other shape – they just need to be identical!
2. Peel the backing paper off one of them then lay the film on a table, sticky side up.
3. Press flat sequins onto the film and sprinkle with glitter.
4. Cut two pieces of ribbon and place on the covering film to make it look like a present.
5. Peel the backing paper off the other square. Carefully press, sticky side down, onto the decorated piece to seal all that sparkly goodness in.
Supplied by Razum International School Singapore (RISS)
16. Jolly Christmas Tree

Nothing says the festive season like a Christmas tree! Kids will love crafting their own personal one, thanks to this simple-to-make cardboard version. Let them go wild when it comes to the decorating part!
You’ll need:
- Markers
- Large sheet of flexible green cardboard
- Scissors
- Craft glue
- Gold paper
- Coloured paper, sequins, pompoms, tinsel etc for decorations
To make:
1. Using this cone template guide as a guide, draw your cone pattern onto the green cardboard, then carefully cut out.
2. Roll into a cone shape, then glue along one edge and stick to close it. It should stand up when you’re done, but trim if necessary!
3. Draw a star on a piece of gold paper, then glue to the top of the tree.
4. Use markers, pieces of coloured paper, sequins and other decorative items of your choosing to decorate the tree.
Supplied by White Lodge International Preschool & Childcare Bukit Timah
17. Teeny Trees

This experience is so simple… and the finished result is so cute! Lay all the materials out and get the kids decorating the trees on their own, although some may need help with cutting duty. If you like, you can also present the star stickers at the end of the experience for a special finishing touch!
You’ll need:
- Scissors
- Cardboard
- Green paint
- Paintbrushes
- Embroidery thread or yarn
- Stickers such as polka dots and stars
- Washi tape
To make:
1. Cut cardboard into triangles of different sizes and paint them green. (We like to use Crayola liquid watercolours because they’re quick to dry and come in really bright colours, but you can always do it the day before with the children using tempera paints.
2. Cut thread, yarn and washi tape into manageable sizes if needed.
3. Let your imagination loose and get decorating!
Supplied by Blue House Nursery & International Preschool
18. Super-special Snowman

Living in Singapore, we don’t get to see snow unless we travel for it or read about it in a book! So your kids will love making their own snowman painting to really get them feeling Christmassy. There’s a little bit of prep involved, but we promise it’s worth it!
You’ll need:
- Snowman silhouette template (see this for an example)
- Laminating pouch and laminating machine* (see note)
- Craft knife
- Black craft paper
- Roller brushes or small sponges
- White paint
To make:
1. A bit of adult participation is required for this! Start off by finding a snowman silhouette image online, and printing off on to A4 paper. Pop into a laminating pouch and pass through the laminating machine. Then use a craft knife to carefully cut around the edge of the silhouette, until you are left with a stencil. See note for another option!
2. Once you have your stencil, have your child place it over a black piece of paper or cardboard.
3. Dip the roller brush or sponge in white paint, then roll over the stencil.
4. Carefully remove the stencil to see the awesome snowman figure they just created!
5. Once dry, they could also decorate it with some snazzy buttons and a face.
*Note: If you don’t have access to a laminating machine, you could use thick, sturdy cardstock instead (it needs to be strong enough to withstand wet paint being brushed onto it). Use a craft knife to carefully cut around the snowman silhouette so that you are left with a stencil.
Supplied by Melbourne Specialist International School
More Christmas crafts…using toilet rolls!
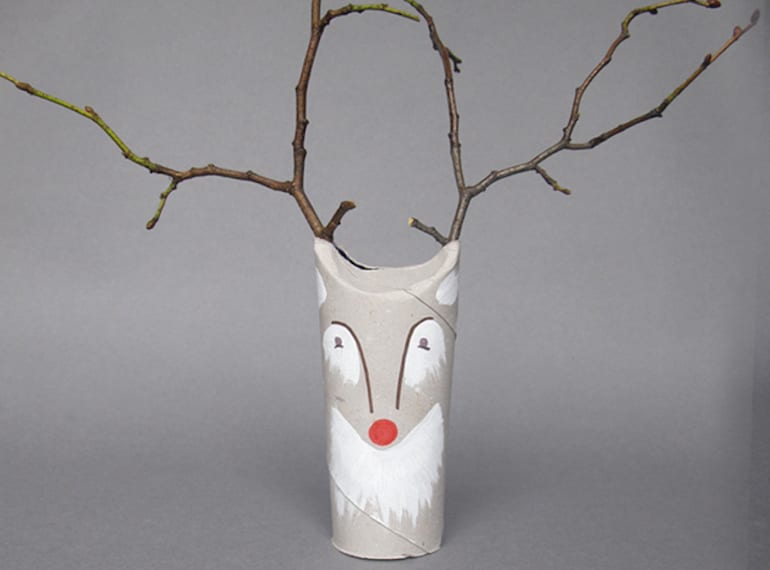
19. A toilet roll reindeer

Take two sticks and a toilet roll to create Ladyland’s cool version of Rudolph for a DIY Christmas decoration with a difference!
20. Toilet roll Christmas pillow boxes!

For washi tape lovers, try these festive pillow boxes. Sustainable DIY festive wrap right there!
21. Toilet roll crackers

Bang! Go crackers creating these colourful decorations using Oh Happy Day’s instructions.
Ready to get Christmas crafting? Check out our list of craft shops in Singapore to stock up on supplies!

